Mywifiext.net Setup for Netgear WiFi Extender
The manual method of Netgear extender installation is done through www.mywifiext.net setup wizard. When you visit the mywifiext Netgear dashboard, it offers you on-screen setup steps to follow. That’s why it is also called a mywifiext.net setup for setting up your WiFi booster range extender. In this section, you will find the instructions to access the www.mywifiext.net setup page for your Extender:
- Once you are on the www.mywifiext.net web page, click on the new extender setup button.
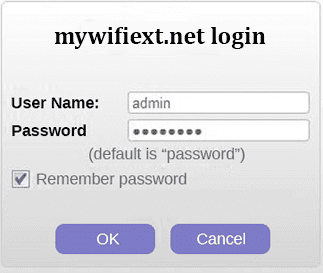
- Enter the username and password for www.mywifiext.net login.
- After that, the Netgear genie smart setup wizard will open.
- Follow the steps given on the www.mywifiext.net setup wizard and set up your extender.
However, these instructions are quite technical which are hard to understand for regular users. So if you stuck at any step while accessing the mywifiext setup page or are getting www mywifiext net refused to connect error, don’t hesitate to get instant help via live chat.
192.168.1.250 – Netgear Extender Login
192.168.1.250 is an IP (Internet Protocol) address used for setting up a new device. If http://mywifiext-local or mywifiext.net not working for you, use the default Netgear extender login IP.
In order to log in to WiFi booster range extender, access point, router, or modem, you just have to access a web browser and enter this default IP in the address bar. This will take you to the www.mywifiext.net setup wizard where you can install and configure your device with great ease. It is specially intended to handle the smart setup wizard for your device and works the same as that of the mywifiext.net local web address.
Here are the steps to access the WiFi extender setup wizard via 192.168.1.250 IP:
- Use any browser and enter the new extender IP address that is 192.168.1.250 into the address bar.
- You will be taken to the extender default login page.
- You will have to enter your credentials (mywifiext.net password and username) to get access to the web page.
- Once done, click on the Login button.
- You will be taken to the admin panel.
- Complete the www.mywifiext.net new extender setup. Then, you can do 192.168.1.250 login by entering your credentials.

The IP 192.168.1.250 lies in the range of 192.168.1.1 & 192.168.1.255 which is of Class C IP range. This address is a part of private IP address following the RFC 1918 standards. However, when the user accesses this address, they get an error message saying ‘this site can not be reached’ or ‘the URL takes too long to respond’. It happens because the IP is only accessible in a private location, not in the public network.
Here, private network means IP packets received from a private range. Network devices such as router provide a private IP address through Network Address Translation (NAS). These addresses are assigned by the existing router via DHCP. Home networks make use of this IP because almost all routers are configured with 192.168.1.1 as WiFi booster range extender default IP. To get rid of 192.168.1.250 login issues, get immediate assistance via live chat.
Mywifiext.net Login
mywifiext.net is the default login web address that is meant for WiFi range extenders. Not only you can visit www.mywifiext.net login web address for WiFi extender setup but also for changing the settings of an already installed WiFi booster range extender.

Mywifiext Not Working
Cross Check the Web Address
Incorrect or mistype http://mywifiext web address can take you to another page or cause www mywifiext net refused to connect error. Therefore, make sure to enter mywifiext Netgear URL without any typing errors.
Update Web Browser Version
Perhaps the web browser you use is out-of-date and not compatible with the mywifiext.local web address. So use only the latest browser version during Netgear extender setup.

Mywifiext Login
Open a web browser
Open any web browser. Ensure that you access the latest web browser version.
Go to mywifiext
In the address field of the browser window, type mywifiext net and press the Enter key. Wait for few minutes and let the www.mywifiext.net page open properly.
Enter the correct credentials
www.mywifiext.net login page prompts you to input username and mywifiext.net password. Enter the details and hit the Log In button. Now, you are on the WiFi booster range extender dashboard.

Extender Configuration
You can change the WiFi network name, passphrase, wireless settings, reset the admin password, and much more via the www.mywifiext.net setup wizard. It takes only two steps to configure your WiFi extender.
Let’s have a look at these steps:
Access www.mywifiext.net Login
Log in to mywifiext net web address via an internet browser. Remember to place your WiFi booster range extender and router in the same room while accessing the extender login page.
Configure Your Extender
Once the www.mywifiext.net extender setup page opens, you can change both the basic and advanced settings of your extender here. Don’t forget to click on the apply button after making the changes.

Common Issues With Mywifiext net Login
When users access the www.mywifiext.net login page, they come across a lot of issues. A few of them are listed below.
Can’t Connect to Mywifiext Local
This mywifiext local error is generally faced by Mac and iOS users. The main reason behind this issue is a slow internet connection. Reboot your network connection and try again.
Mywifiext Not Working
If you’re using mywifiext net for extender login, try accessing mywifiext.com or http://mywifiext-local web address. In case the issue is still there, move your extender closer to the router.
Stuck at mywifiext.net Login Screen
www.mywifiext.net setup wizard keeps asking for username and password? Well, the login details are case-sensitive, so be certain to input the correct login credentials with no typing errors.
Why I Can’t Access mywifiext.net
Sometimes, it is a common mistake or sometimes, it is a big technical issue when users can’t access the default www.mywifiext.net login portal. If you are also unable to log in to your WiFi booster range extender, here are the reasons behind it:
- Incorrect web address
- Slow or intermittent internet connection
- The outdated web browser version
- The extender’s and router’s settings are not the same
- Problems with Windows Firewall settings
- Pre-shared key and SSID issues
- You are not connected to the range extender’s network
- Server not found at http://mywifiext
- IP confliction problems
- Issues with Domain Name Server (DNS)
Troubleshooting Steps to Fix mywifiext.net Login Issues
Go with the below-given steps to resolve problems with the mywifiext net login.
- Check the distance between your WiFi range extender and router.
- Confirm if your extender is getting proper power supply. Check the power LED to know the status of the power supply.
- Also, see the Extender LED.
- Sometimes, there might be an issue with your web browser. Try accessing another web page on this browser. If it doesn’t open properly, it means your browser is running the outdated version. So update it as soon as possible.
- If you still face the www mywifiext login issue, switch to another web browser.
- Sometimes, the wireless connection doesn’t work. In this case, try to use the hardwired connection.
Mywifiext.local Setup
Still mywifiext.net not working? If yes, chances are that you are using the wrong web address. Wondering how? Let’s clarify here that there is a different web address used to set up a WiFi range extender for Mac OS X or Apple iOS devices. And that is mywifiext.local. While installing the WiFi extender for Mac or iOS devices, you have to first complete the www mywifiext local set up success. Here’s how to do so:
- Power on your range extender by plugging it into a wall outlet.
- Make a wired connection between your extender and home WiFi router.
- Afterward, launch your favorite internet browser on your Mac OS X or iOS device.
Quick Tip: Use only the latest version of the web browser to get mywifiext.local setup success.
- Type http://mywifiext.local in the address bar and press Enter.
- Mywifiext local login window will appear on the screen.
- You will be required to enter the username and password.
- Fill in the mywifiext.local login details and click on the Log In button.

Once logged in, you will see the mywifiext.local setup page. Now, you just need to follow the on-screen steps to set up a new range extender or change the settings of existing extender as per your preferences. If mywifiext.local not working on your Mac OS X and Apple iOS device, move to the next section and find the relevant troubleshooting tips.
https://mywifiext.local Fails to Connect
When you set up your Netgear AC1900 (EX7000) WiFi range extender on Mac OS X, you need to access mywifiext local. However, this link fails to connect. To resolve the http://mywifiext-local fails to connect issue, you just need to go through the steps given below:
- If you are using Safari browser, try Google Chrome or Mozilla Firefox to access the extender login page.
- Try using 192.168.1.250 IP address to access the mywifiext local portal.
- Check whether your extender is running on the latest firmware version or not.
Most probably, the aforementioned steps should give you the mywifiext local set up success. But if you are still having a hard time while connecting to www.mywifiext.net new extender setup page, chat live and get immediate assistance.
Connected to Netgear_Ext But Can’t See the Web Browser Setup Guide?
Another issue which users generally come across is that the web browser setup guide, Netgear installation assistant or www.mywifiext.net setup doesn’t open. This may happen because of improper wireless connections and other technical problems. However, with a few troubleshooting steps, this issue can be easily resolved:
- Firstly, check whether your PC is set to use DHCP i.e. Dynamic Host Configuration Protocol. If not, set it on DHCP.
- The Device Link LED on your extender must be solid green.
- After that, ensure that you are making use of a valid IP address.
- Re-open the browser window and navigate to mywifiext setup web page using the correct username and password.
- On the other hand, if you want to install your WiFi range extender as an access point, make sure to use a WiFi connection. Don’t use the wired one for connecting your wireless as well as wired devices to the extender.

Our Recent Blog
What is Kindle? How to Connect My Kindle with WiFi Extender?
February 22, 2024Kindle is one of the smartest small hand-held electronic devices for reading books that was developed by the best leadin
Read More
How to Connect WiFi Extender to Xfinity Gateway [2024]
February 14, 2024WiFi range extenders are greatest options to consider when it comes to making the most of the existing WiFi network. The
Read More
Netgear WiFi Extender Not Working with New Spectrum Router?
February 10, 2024“I am trying to install my old Netgear extender with a new Spectrum router. However, there seems to be a hindrance tha
Read MoreMost Common Netgear Extender Issues
Users come across various issues while using their WiFi extenders. Some of them are listed below:
- Netgear extender won’t connect to router
- iPhone won’t connect to extender
- WiFi extender connected no internet
- Extender not showing on network list
- Netgear extender not connecting to WiFi
- mywifiext.net won’t load
- Extender won’t reset
- WPS light blinking
- Netgear extender showing red light
- Can’t do new extender setup
- Extender keeps dropping the internet connection
- Extender won’t detect 5GHz WiFi signal
- Netgear extender power LED won’t glow
- WiFi extender not working
- Extender is overheating
- Can’t update extender
- Can’t log into Nighthawk app
- Authentication error occurred
- Extender not found
- 192.168.1.250 IP not working
- Can’t perform mywifiext net login
- ISP change DNS settings
- WiFi extender no IP address
- Netgear extender won’t recognize password
- Extender keeps turning off
- www.mywifiext.net refused to connect
If you are troubled by any of these issues, get immediate assistance right away via chat support. However, for your convenience, we have answered some of the queries.