
How to Connect Netgear WiFi 6 Extender to Nighthawk Router?
“I own a Netgear WiFi 6 extender, particularly, EAX20 model, and a host router. I’m wondering whether I can boost the signal strength by connecting them with a wire. Can I use an Ethernet cable for this purpose or there is a specific setup that I need to follow for a wired connection? Help would be much appreciated.”
This query got rolled out on 1st December 2023 by some of the struggling users owning Netgear wireless range extenders. By any chance, if you are amongst them, then you should thank your lucky stars considering you landed on the right post.
Here, we have talked in detail how you can connect your Netgear extender, regardless of the model in use, and the router via an Ethernet cable, the precautions while doing so, and the steps to complete the setup process after that. Given this, let us get the ball rolling.
What Precautions Should You Take?
Prior to learning how to connect your Netgear WiFi 6 extender to the router, don’t you think you should fill your brain with the necessary precautions? If you do, keep reading:
1. Use a Non-Damaged Ethernet
The most obvious thing that you ought to ensure is that the Ethernet cable is not damaged. Using the one with cuts on or in it will cause technical issues to the table, thereby stopping you from setting up the Netgear WiFi 6 extender via mywifiext with ease.
2. Ensure You Hear a Click Sound
Once you have plugged the cable into the ports of the networking devices, see to it that you hear the click sound. By this, we are referring to the sound that gets produced when the cable gets clipped in thereby indicating the connection is finger-tight.
3. Place the Devices in Proximity
There is an average length of an Ethernet cable. This means that it can only be pulled to an extent. Given this, make sure that you place the networking devices close to each other, enough that the Ethernet cable doesn’t keep getting unplugged repeatedly.
4. Clean the Ports Prior to Using
Before you plug the Ethernet cable into the networking devices, it is recommended that clean the ports located on them. The same can be done if you make use of a cotton swab. You can also use a fiberglass pen for this purpose. It looks like the image below:

Steps to Connect Netgear WiFi 6 Extender to Router
1. Unpack the Netgear Extender
The process can be commenced once you unpack the Netgear WiFi 6 extender. The Ethernet cable comes along with most Netgear wireless range extenders. Chances are that it might have come with the one you purchased too. However, in case, it did not, then you ought to step out of your house and purchase an Ethernet cable.
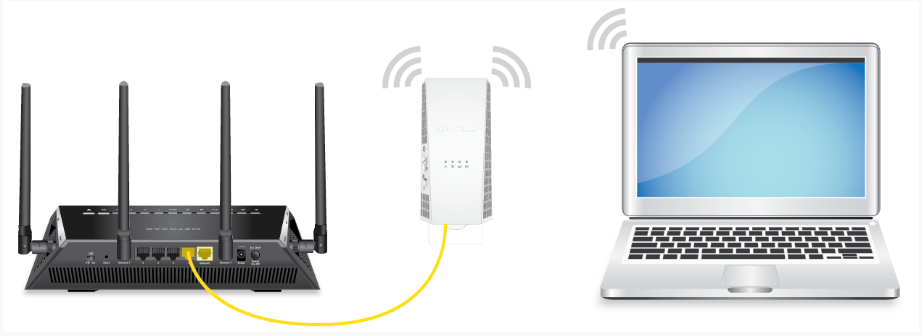
2. Put the Ethernet Cable to Use
Once you have access to the Ethernet cable, connect the Netgear extender to the host router using it. First, connect one end of the cable to the port of the extender and another to the LAN port of the router. Now, wait for more than 2 MINUTES. This will give your devices enough time to connect to each other.
Now What?
Once you have joined the Netgear WiFi 6 extender to the router, execute the setup process further. To learn how the same can be done, following are the steps you should read:
- Plug the Netgear extender into a socket and let the LED become solid.
- Once it does, switch on your laptop and ensure that it is connected to WiFi.
- In other words, it needs to have a connection with the Netgear extender.
- As soon as you are done with this, open an internet browser.
- Go to the URL field and enter the mywifiext.net web address or 192.168.1.250 IP.
- Pressing the Enter key will redirect you to the NEW EXTENDER SETUP page.
- Click the I AGREE button when asked to agree to the TERMS & CONDITIONS.
- Leave the username as ADMIN and choose a unique password.
- Select and answer two security questions next.
- Click the CONTINUE button and select the network of the Netgear WiFi 6 extender.
- Enter the NETWORK KEY or WIFI PASSWORD and wait for some time.
Soon your Netgear wireless range extender will extend the range of your router in your house. Now, you can do Netgear extender login and tweak the settings as needed.
To Conclude
With the aid of the information given above, you will face no technical issues to connect the Netgear WiFi 6 extender as well as the host router using an Ethernet cable and completing the extender setup process. Now, you can access a seamless WiFi connection.